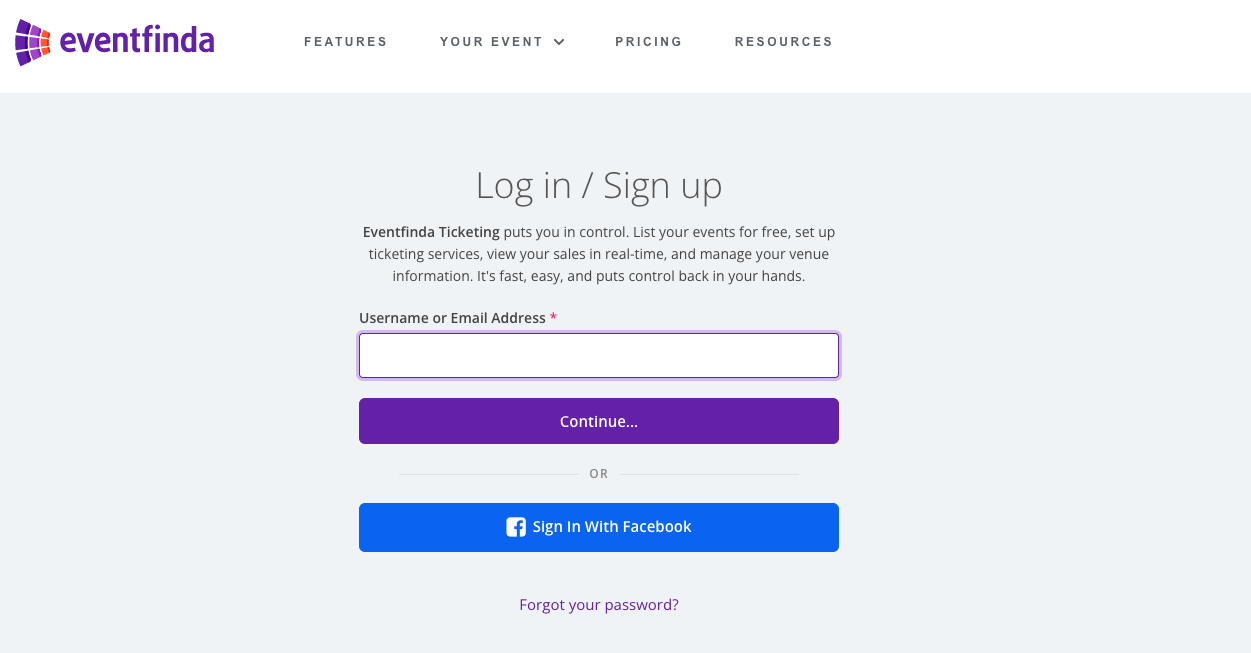
Log in to Eventfinda Promoter Portal with your account.
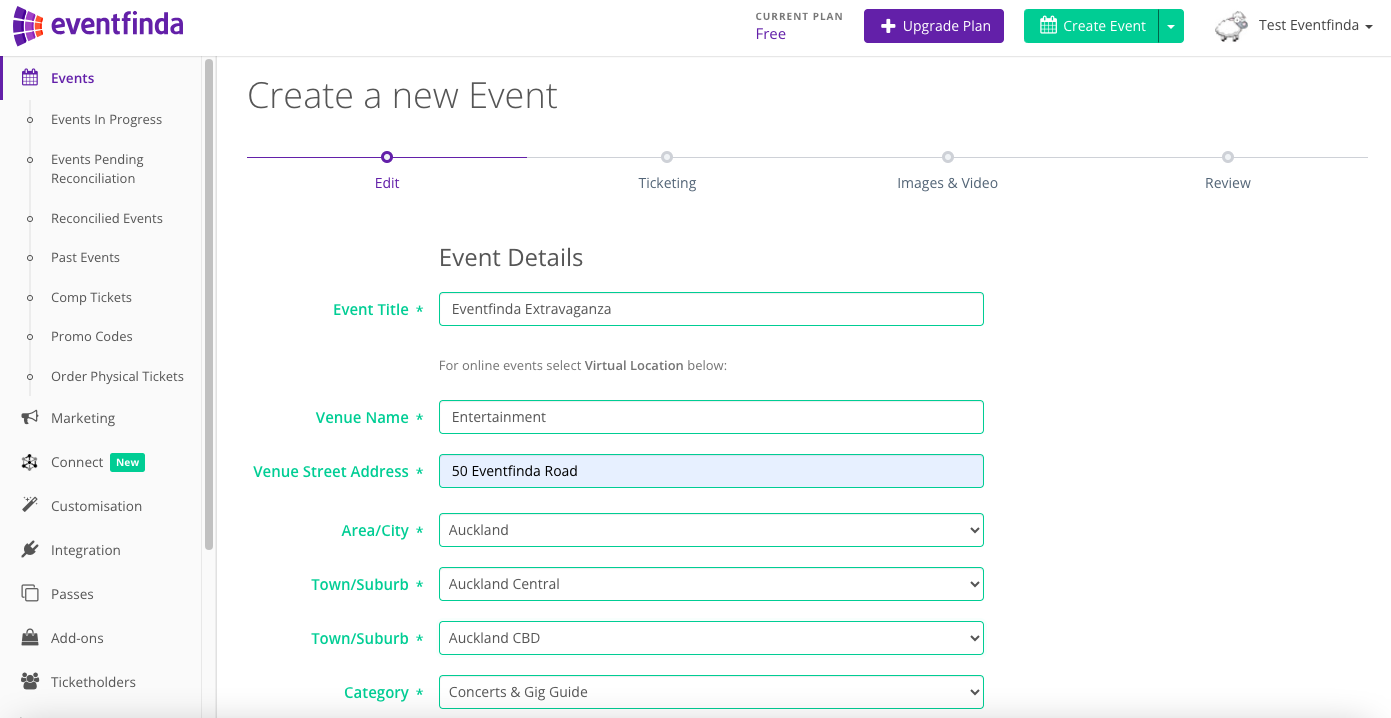
Click on the Create New Event button.
Enter your event details in the form provided including Event Title, Venue, Category and Sub-Category, Session time/s, Website/s, and a short Description.
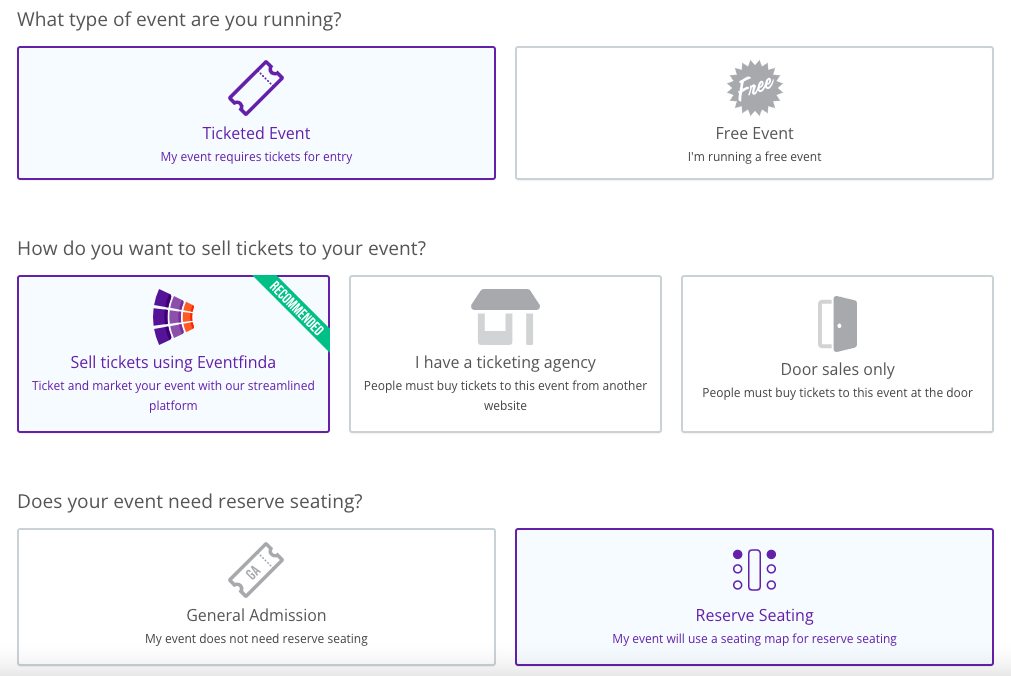
On the next page, you'll choose admission access and what type of event you're running.
If there is a seating map already associated to the venue you are using, you'll see the option to add reserved seating.
If there is not an existing seating map for this venue you will see this screen and you can request one to be created.

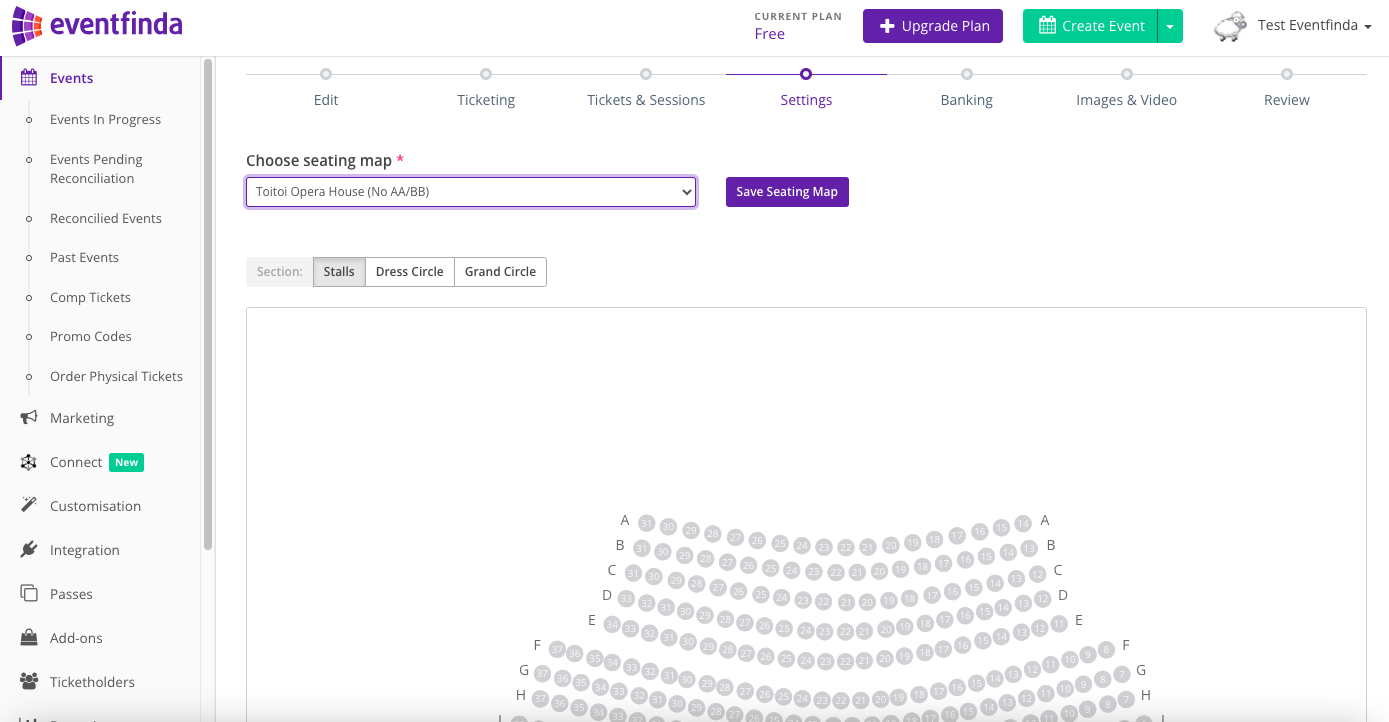
Click the arrow under 'Choose seating map' to select which map you'd like to use. You'll be able to see a preview of what the map looks like. Then click Save Seating Map.
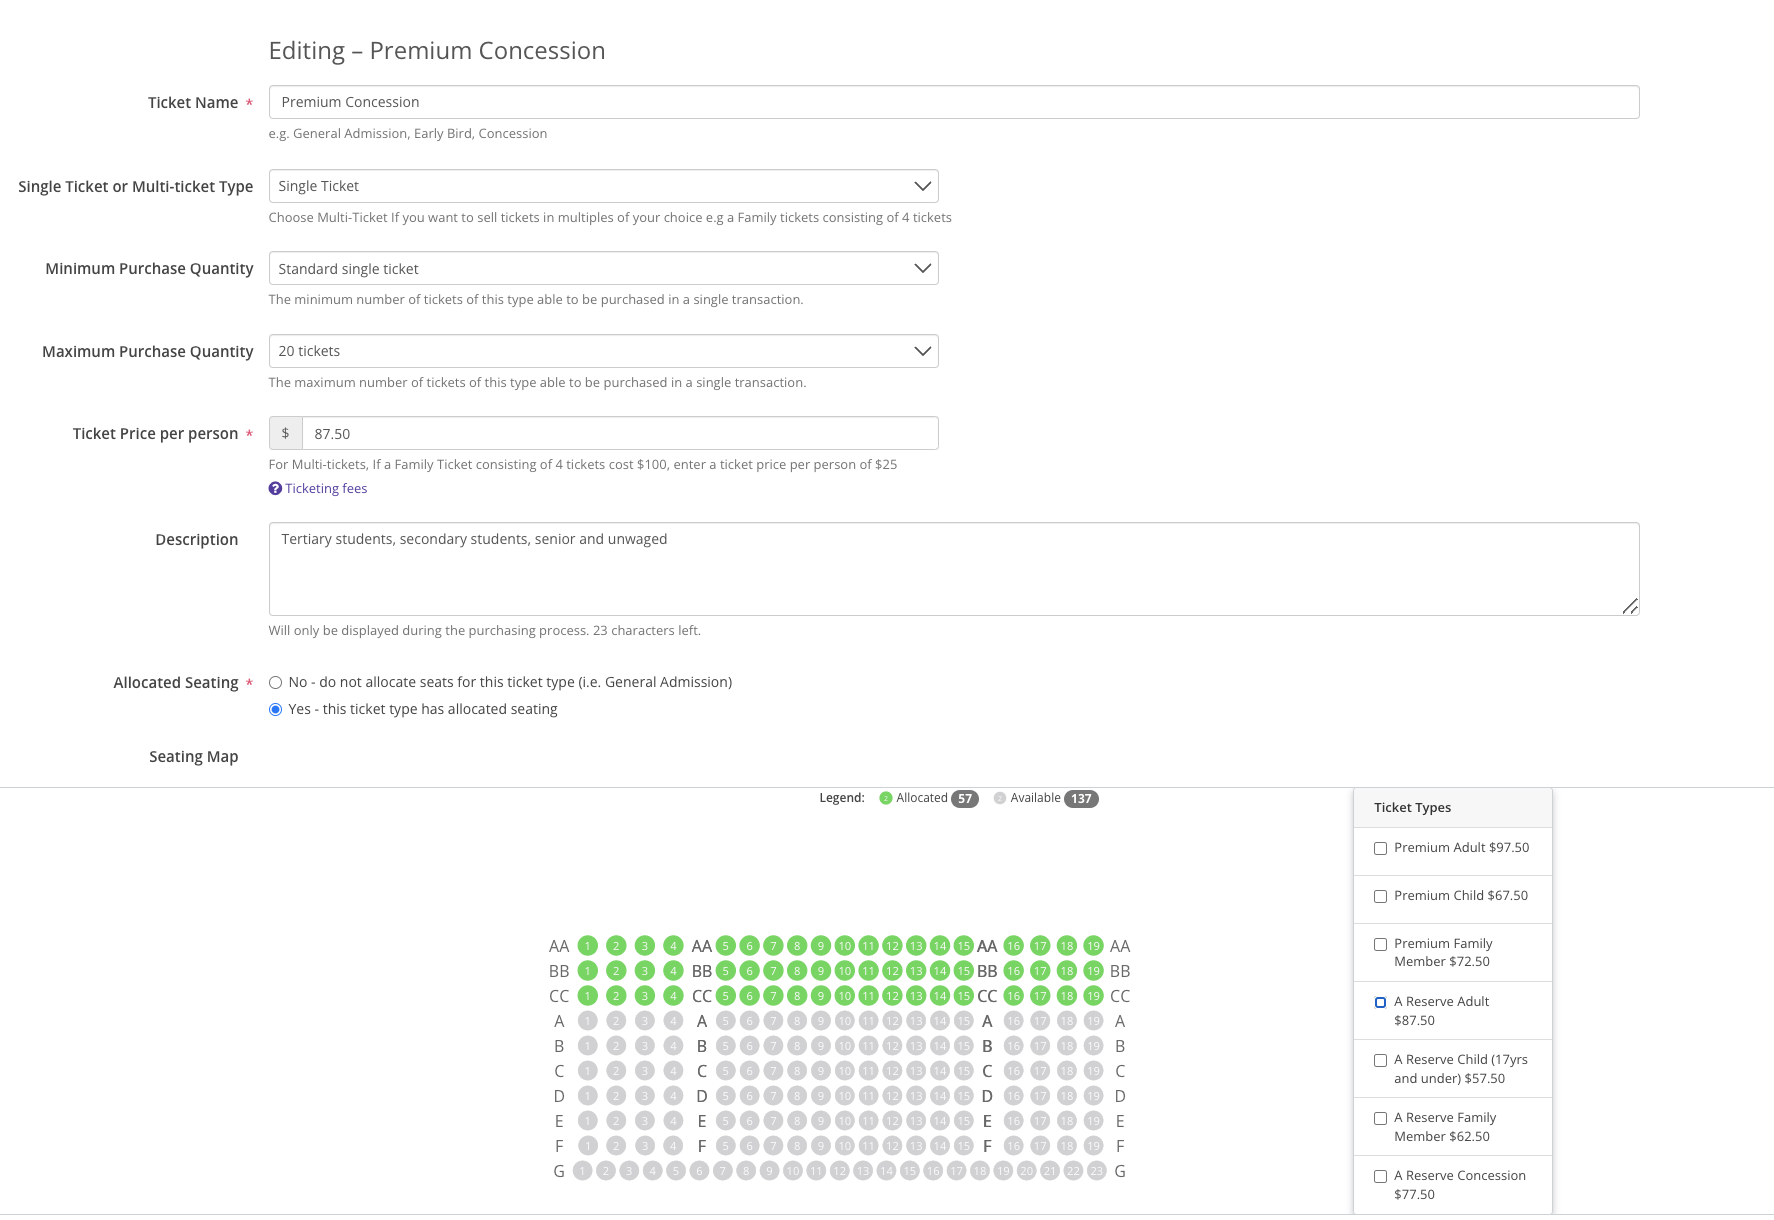
You'll then create your ticket type. Add all details needed and click Yes next to Allocated Seating.
The map will appear and you'll need to associate the ticket type to any seats that it will be available for. You can click on each seat individually or click-and-drag to select multiple.
Now your seating map has been added to your event. You can add more ticket types if needed and complete the process of creating your event.
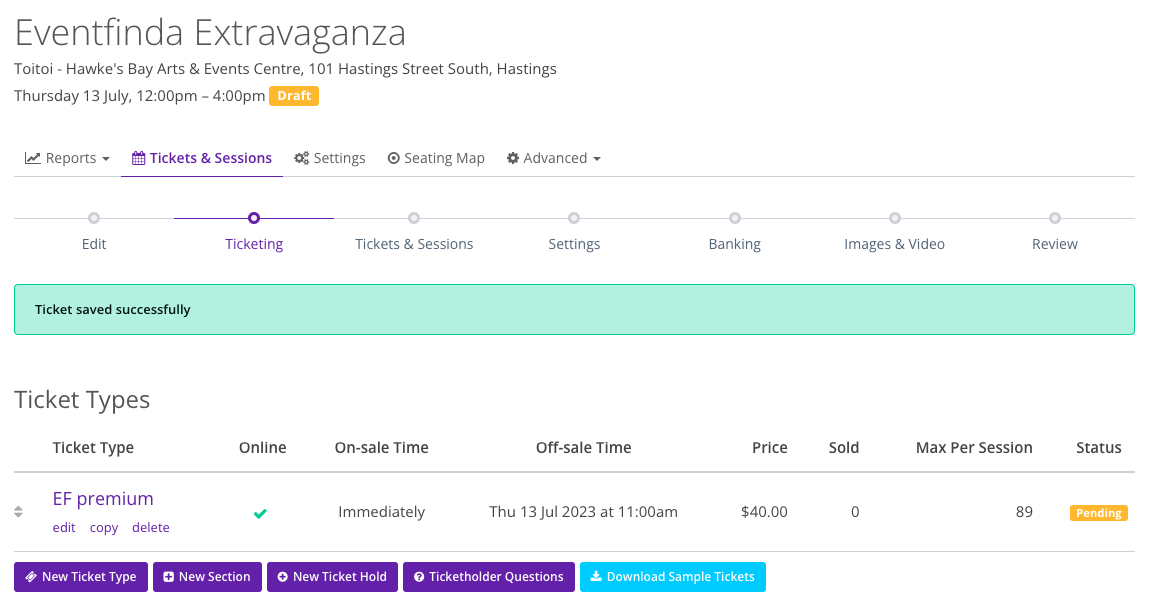
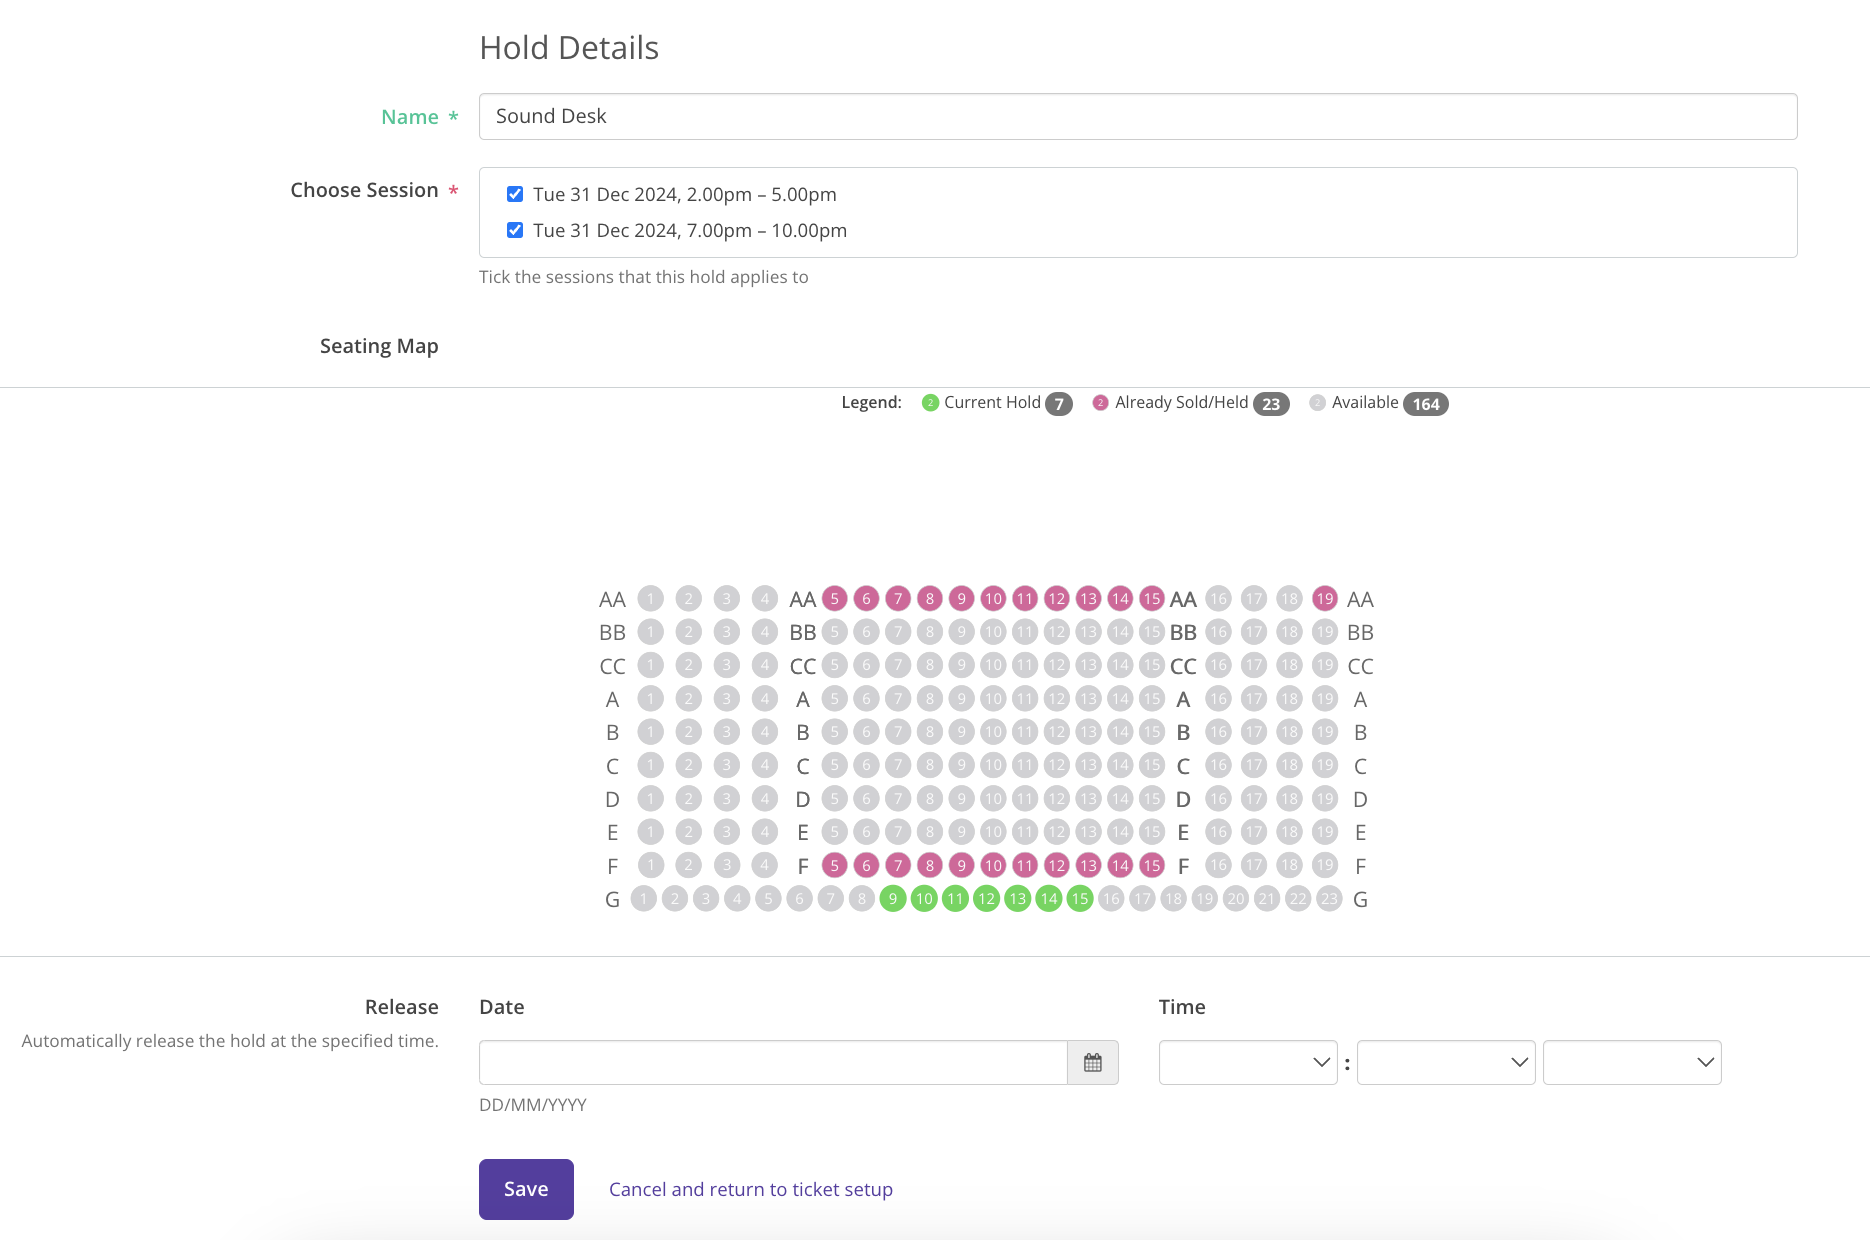
If you need to set some seats aside to not sell publically, you can click New Ticket Hold underneath the ticket types you've allocated.
Give the hold a name, select the session(s) and select the seats. You can choose the seats individually or click-and-drag to select multiple.
If you need the seats to be available to purchase at a certain date and time, add this to the Release Date. If you don't add a Release Date, the seats will not ever be available.